
The Lego Flash Behind The Scenes
I have long wanted to make an image of the flash so when the lego batman magazine featured him on the front cover, I knew I had to get it.
My concept was The Flash running at speed with his characteristic lightning and a feeling of being the fastest man alive.
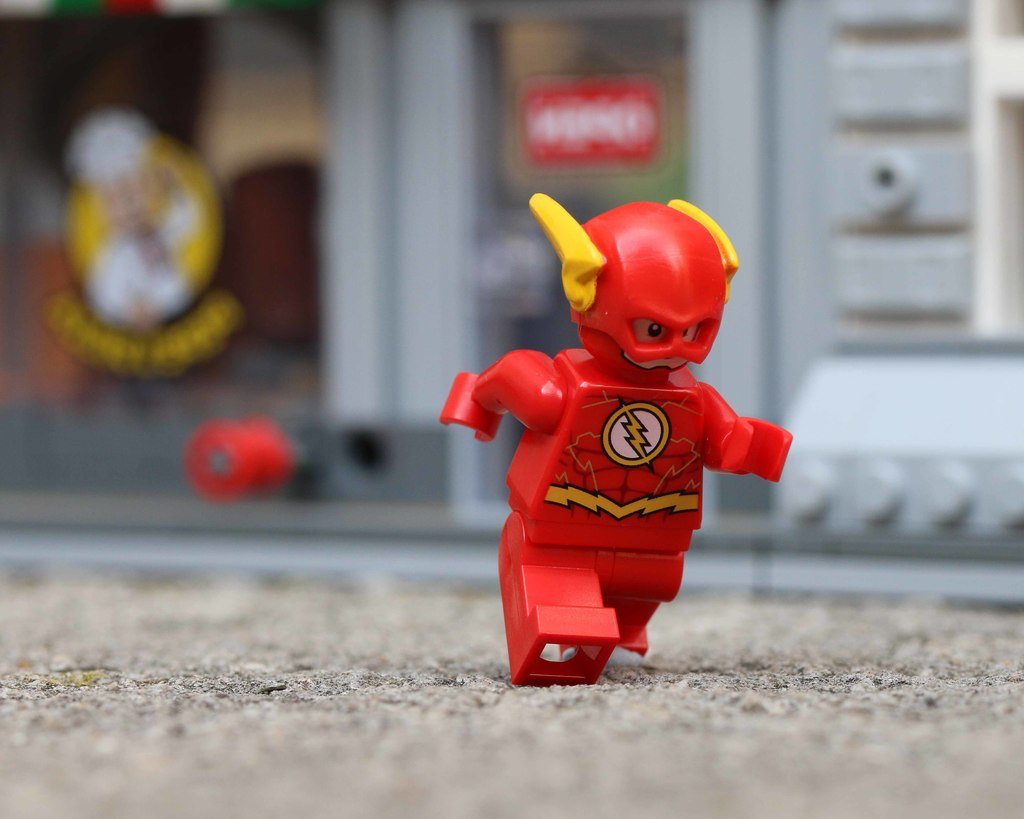
My set up was the flash running, held up with blue tac and a lego background building, which in this case was the Sanctum Sanctorum. Usually I’d have the character running into the scene but in this case I used the other side of the two thirds because of the lightning affect I was planning for behind him.
Step 1 – Motion Blur
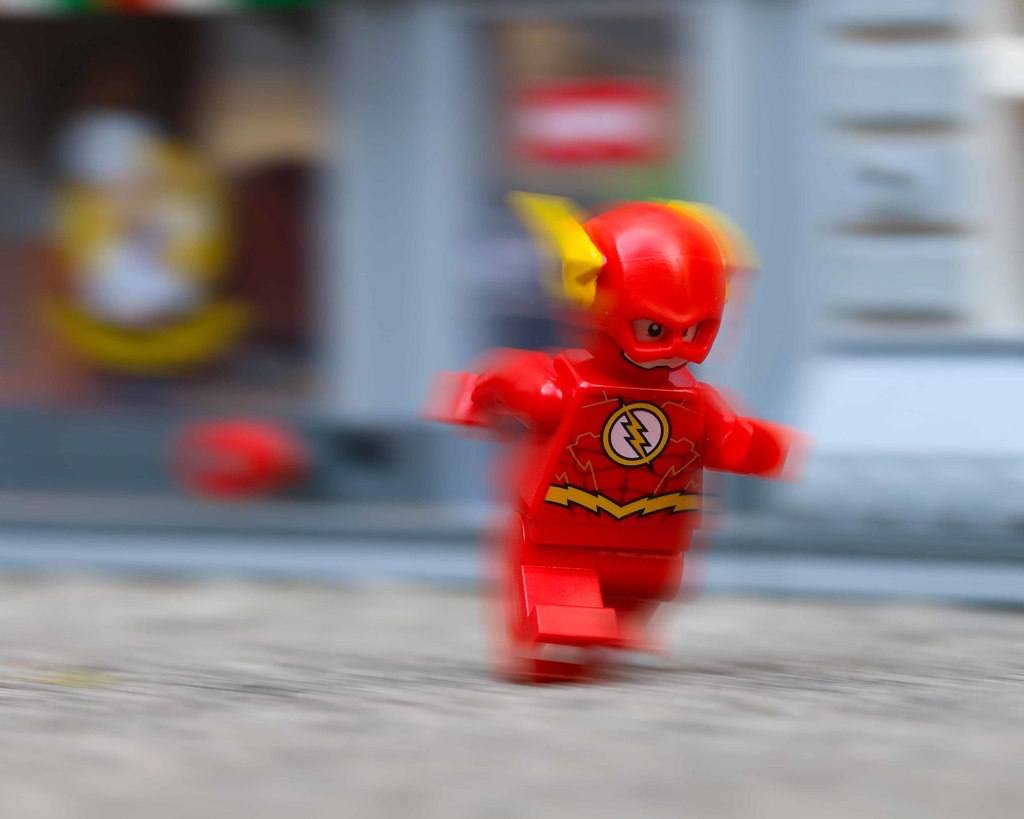
Once in photoshop I duplicated the layer and added a motion blur filter. I played around with a few different levels but in the end I like a -7 degree angle at a distance of 250 pixels.
I used a layer mask to bring the lego flash back into focus. I left the edges blurred as I think it helps with the overall speed affect.
Step 2 Lightning
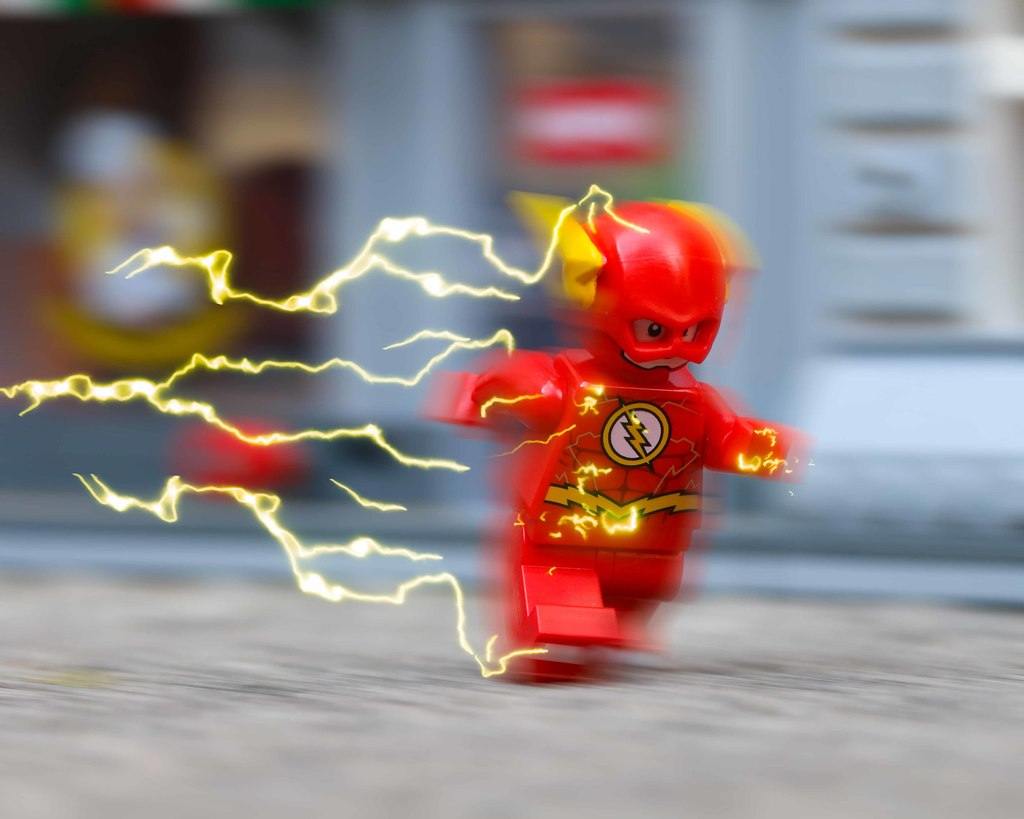
Next stage was to add the lightning. I used the “place” function in screen blending mode. To get rid of the background glow I used a levels adjustment. Once the lightning was in place I used the transform tool to distort it and position it as if he was running. The lightning I used was blue in colour so I added a hue/saturation layer to make the lightning yellow – like the real flash. Then it was a case of repeat this process until I was happy with it – as above.
Step 3 Glow

All good lightning, when you run that fast, has to glow. So that was my next task. I created a new layer in overlay blending mode. Using the colour picker I chose a yellow and painted in the glow. While I was painting I also decided to add a glow to his face and logo to help them stand out as he runs with the speed force. I reduced the opacity until it was just the right amount of glow.
Step 4 Finishing the Affects

I wanted to add some sparks – using the place function – below his feet as that’s what happens when you run that fast. Once that was done I felt I needed to move the lightning so it didn’t overlap. I made a few small adjustments to the position of the lightning. I also added a little more glow to the overlay layer I’d created in step 3.
Step 5 Final Adjustments
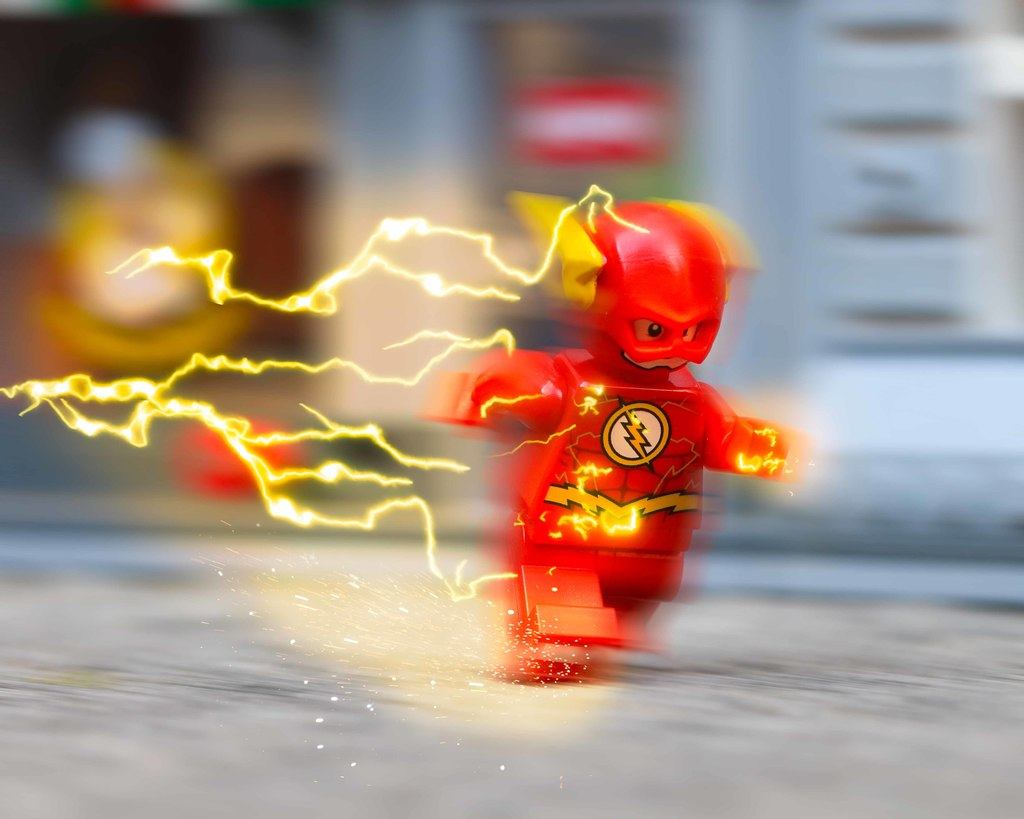
My final adjustments were made in Lightroom. I added some saturation and vibrance and adjusted the tone curve to make it a slightly darker shot. (Flash takes on most villains at night.) Finally I added a little vignette to darken the edges.
And there you have the final image. I hope you like it. I’d love to hear your thoughts and what you would have done differently.